In the previous post, we have created a CI (Continous Integration) pipeline for a SQL Server database project. For this demo, as like our previous demo, we will be using a SQL Server instance running on an on-prem machine along with a locally installed Azure DevOps Server. Please note that we are not using the Azure DevOps Services which is the cloud version of Azure DevOps Server.
So far, we have completed the below points:
- Downloaded and installed Azure DevOps Server
- Completed setup for the Database project for a SQL Server database
- Created a GitHub repository and push the source code into the GitHub
- Created a continuous integration pipeline using Azure DevOps Server with below CI tasks:
- MSBuild Task – This task builds the solution
- Copy Files to – This task copies artifacts to the Staging directory.
- Publish Build Artifact – This task publishes the artifacts to the Azure DevOps Pipeline so that it can be accessible in the release pipeline.
- Enabled a build trigger
Now, we are going to create a release pipeline for Continuous Delivery of our Database project.
Continuous deployment for SQL Server Database
Continuous deployment/Continuous delivery is the next step after continuous integration. The CD pipeline helps us to deploy the build artifacts to the desired server. In this example, we will deploy the build artifacts to a SQL Server database running on the localhost server. In order to do that we need to follow below steps:
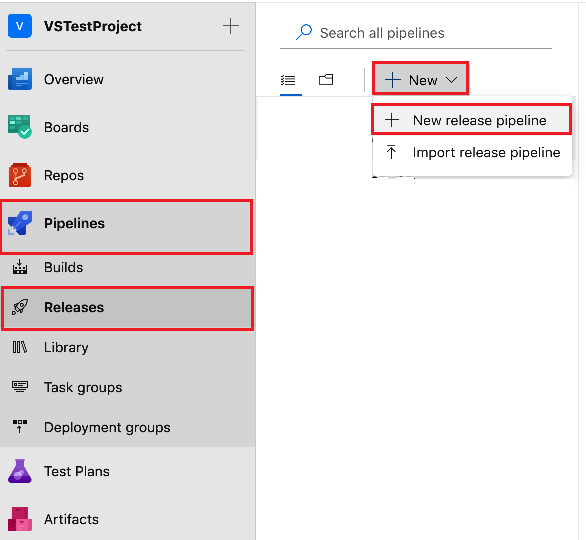
- Open Azure DevOps Server URL and go to Pipelines -> Releases -> New -> New release pipeline.
- Select the “IIS Website and SQL database deployment” template from the template list and click on the Apply button. This will add 2 jobs and 3 tasks for the selected stage.

- Now, click on the “Add an artifact” button in the Artifacts tab.

- In the “Add an artifact” dialog box, select Build as the source type. Next, choose your project from the project drop-down and your CI build pipeline from the Source (build pipeline) dropdown. Finally, select the Latest from the Default Version drop-down and click on the Add button.

- Now, click on the “View Stage Tasks” link (the link which has a text like 2 jobs 3 tasks in the Add an artifact image). It will open the tasks for Stage 1. We need to remove all the tasks related to the IIS deployment as we are not going to deploy any website. To do that, click on the IIS deployment group job, and from the right side menu, click on the remove button. It will remove all the IIS related tasks.

- Next, click on “Stage 1” stage name and set the appropriate properties. Select “Sql Dacpac” in “Deploy SQL using” dropdown as we are going to deploy our CD pipeline using dacpac file. Set Specify SQL using as Server and put the database name where we want to deploy our dacpac files.

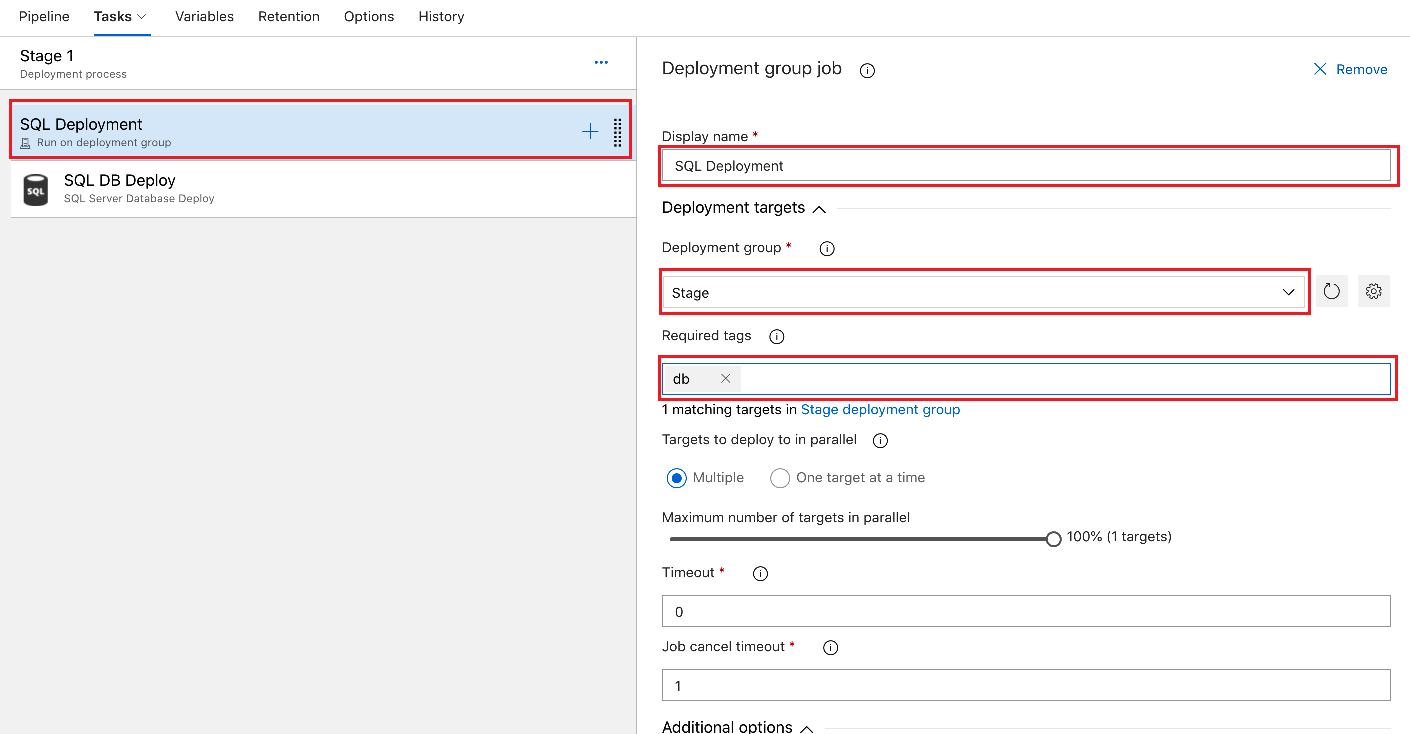
- Now, click on “SQL Deployment” group job and put a name for this group job. Next, choose a Deployment group and Required tags, If needed, we can add a Deployment group and tag by clicking on the settings icon and by registering a new server.
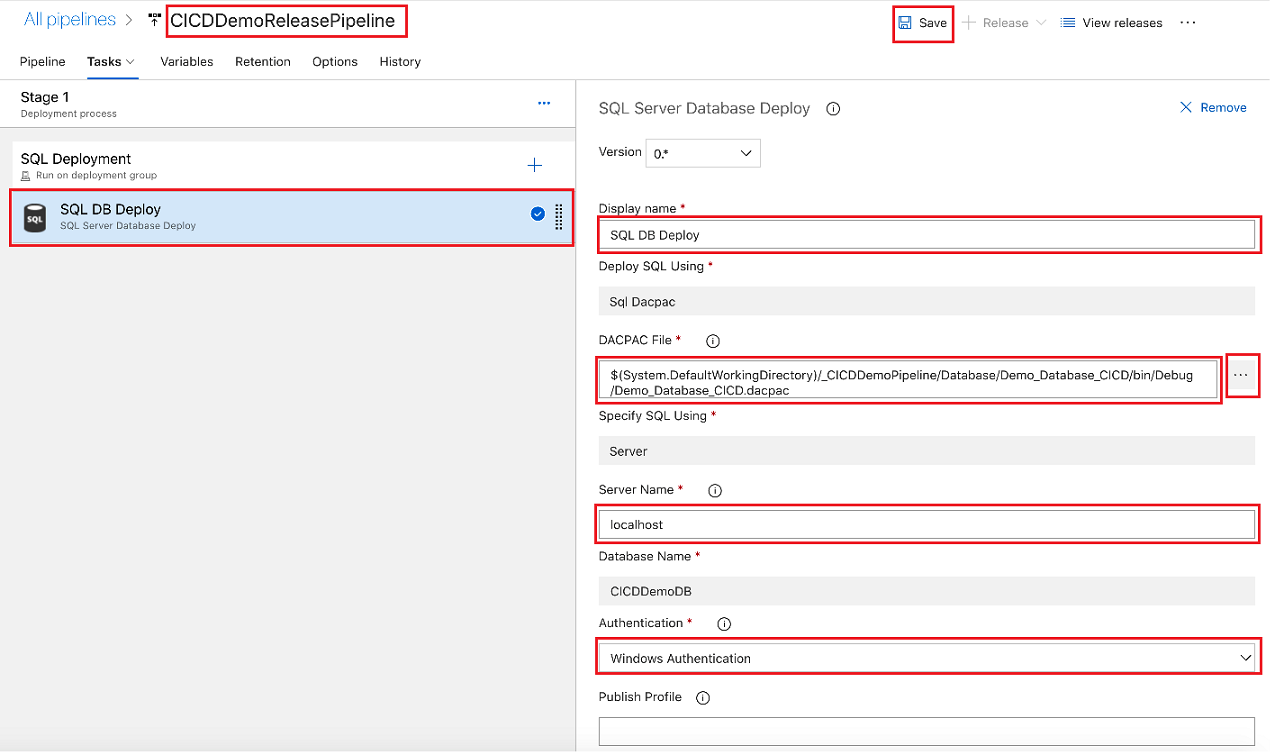
- Now, click on the SQL DB Deploy task and set the properties. Choose the appropriate dacpac file by clicking on the ellipsis right to the DACPAC file option. Put the server name and authentication. After that, rename the release pipeline as “CICDDemoReleasePipeline” and click on the Save button at the top.
- Now, we have done with our CD pipeline. Finally, we need to set up a release trigger for this pipeline. To do that, click on the Pipeline tab and then click on the Continuous deployment trigger button in the artifacts tab and enable the create a “Release every time a new build is available” button.

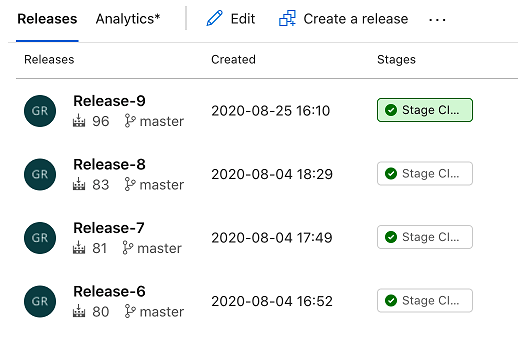
We have completed the set up of our Continous Delivery/Continuous Deployment pipeline. Now, whenever we will push any change into our git repository into our database project, it will automatically trigger the build and release pipelines.
If we want to more deployment environments, we can add more steps and set it up. Also, we can configure the manual approvals in between if it is needed. Each stage can handle a dedicated deployment environment.
Thanks for the reading. Please share your inputs in the comment section.
