In this post, we will demonstrate how easily we can create a web application with CRUD functionality using ASP.NET Core, MVC, and Entity Framework. ASP.NET core is a part of the .NET Core framework which is an open-source framework for Windows, macOS, and Linux operating systems. It provides a cross-platform development environment for the developers. In order to create our web application with CRUD (CREATE, READ, UPDATE, and DELETE) functionalities, we will set-up our project using MVC (model-view-controller) template design. We will enable CRUD operations on a SQL Server table. Below are the tools and tech stacks that we are going to use in this demo:
- Visual Studio 2019
- .Net Core 5.0
- ASP.NET Core 5.0
- MVC 5.0.1
- Entity Framework 5.0.1
- SQL Server 2019
In this demo, we will use a SQL Server table named “dbo.tbl_EmployeeMaster” from the WebAppTestDB database. In order to create this web application, we need to follow the below steps.
Create a test database and a test table
For the demonstration purpose, we need to create a sample database and a test table with the optional dummy data. We are going to create a database named “WebAppTestDB” with a test table named “dbo.tbl_EmployeeMaster“. At the end of the script, we have also added some sample records into the table. Use, below script to create the test database and table:
--Create database WebAppTestDB
CREATE DATABASE WebAppTestDB;
GO

--Start using the WebAppTestDB database
USE WebAppTestDB;
GO

--Create Employee Master table
CREATE TABLE [dbo].[tbl_EmployeeMaster](
	[EmployeeId] [int] NOT NULL PRIMARY KEY,
	[Name] [nvarchar](256) NOT NULL,
	[EmpAddress] [varchar](256) NOT NULL,
	[Contact] [varchar](20) NOT NULL,
	[Designation] [varchar](256) NULL,
	[DateOfBirth] [date] NULL,
	[Gender] [varchar](25) NOT NULL
);
GO

--Add some sample records
INSERT INTO [dbo].[tbl_EmployeeMaster]
([EmployeeId], [Name], [EmpAddress], [Contact], [Designation], [DateOfBirth], [Gender])
VALUES
('100', 'Smith', 'New Delhi', '1234567890', 'Engg Head', '19741010', 'Male'),
('101', 'David', 'New Delhi', '9876543210', 'HR Head', '19781210', 'Male')
GO
Create a new ASP.NET Core MVC Web Application
In order to create an ASP.NET Core Web Application with MVC architecture, we need to follow the below steps:
- Open Visual Studio 2019
- Choose the “Create a new Project” option from the Get Started section and click on the Next button.

- Next, choose “ASP.Net Core Web Application” from the template types and click on the Next button.

- On the next screen, configure your new project by providing the project name and destination, and then click on the Create button.
- Next, the “Create a new ASP.NET Core web application” dialog box will appear. Choose ASP.NET Core Web App (Model-View-Controller) as a project template and select .Net and ASP.NET versions from the above dropdowns. For this project, we have selected the .NET Core and ASP.NET Core 5.0.

- A project will be created with the below files and folder structure.

Install Entity Framework Core (Use the same version as of .Net Core version)
Next, we need to install the Entity Framework Core. Entity Framework is an ORM (object-relational mapping) that facilitates database operations on the underlying database tables without writing any SQL code. EF works as a wrapper and automatically creates and execute the SQL code behind the scene. In order to install Entity Framework, let’s follow the below steps:
- Right-click on the project ASP.NETCoreCRUD and select “Manage NuGet Packages“. NuGet package manager window will open.
- Click on the Browse tab and type “Entity Framework Core” and hit the Enter key. Select the “Microsoft.EntityFrameworkCore” and choose the latest version which is the same as the project version. In our case, we are using .Net Core 5.0 and hence we are choosing Entity Framework 5.0.1.
- Finally, click on the Install button.

Alternatively, you can use the NuGet Package Manager Console to install this package. We can use the below command:
Install-Package Microsoft.EntityFrameworkCore -Version 5.0.1
Install Microsoft.EntityFrameworkCore.SqlServer package
Now, we need to install Microsoft.EntityFrameworkCore.SqlServer package which helps us to perform DML operations on a SQL Server table.
- Go to “Manage NuGet Packages“.
- Click on the Browse tab and type “Entity Framework core SQL server” and hit the Enter key. Select the “Microsoft.EntityFrameworkCore.SqlServer” and choose the latest version.
- Then, click on the Install button.

Alternatively, you can use the NuGet Package Manager Console to install this package using the below command:
Install-Package Microsoft.EntityFrameworkCore.SqlServer -Version 5.0.1
Add a connection string in the appsettings.json file
Now, we need to add a database connection string in our web application.
- Open the appsettings.json file from the solution explorer and double-click on it to open it.
- Then, add a connection string for the WebAppTestDB database which looks like this.
"ConnectionStrings": {
"WebAppTestDB": "SERVER=localhost;Trusted_Connection=yes;DATABASE=WebAppTestDB;"
}
The complete appsettings.json file will look like this.
{
  "Logging": {
    "LogLevel": {
      "Default": "Information",
      "Microsoft": "Warning",
      "Microsoft.Hosting.Lifetime": "Information"
    }
  },
  "AllowedHosts": "*",

  //Db connection for WebAppTestDB database is added here
  "ConnectionStrings": {
    "WebAppTestDB": "SERVER=localhost;Trusted_Connection=yes;DATABASE=WebAppTestDB;"
  }
}
Add a model class for the database table
Next, we need to add a model class that will represent our database table dbo.tbl_EmployeeMaster. Each model in the entity framework represents a database table. We need to bind this class to the database table using a database context class. Let’s add the EmployeeMastet model class.
- Right-click on the Models folder and choose Add -> Class to add a new model class for the Employee master table.
- Put a name for this class file. We have used “EmployeeMaster.cs” in our case.
- Now, open the “EmployeeMaster.cs” file and add all the column details and set other required properties. We have added the below code to the EmployeeMaster.cs file.
using System;
using System.Collections.Generic;
using System.Linq;
using System.Threading.Tasks;
using System.ComponentModel.DataAnnotations;
using System.ComponentModel.DataAnnotations.Schema;

namespace ASPNETCoreCRUDSample.Models
{
    [Table("tbl_EmployeeMaster", Schema = "dbo")]
    public class EmployeeMaster
    {
        [Key]
        public int EmployeeId { get; set; }

        [Column(TypeName = "nvarchar(256)")]
        [Required]
        public string Name { get; set; }

        [Column(TypeName = "varchar(256)")]
        [Required]
        public string EmpAddress { get; set; }

        [Column(TypeName = "varchar(20)")]
        [Required]
        public string Contact { get; set; }

        [Column(TypeName = "varchar(256)")]
        public string Designation { get; set; }

        [Column(TypeName = "date")]
        [DataType(DataType.Date)]
        public DateTime DateOfBirth { get; set; }

        [Column(TypeName = "varchar(25)")]
        public string Gender { get; set; }
    }
}
This class represents the database table tbl_EmployeeMaster at the application layer. A primary key is required for each entity and hence we have used [Key] annotation on the EmployeeId column.
Add a DBContetxt class in the Models folder
Now, we need to bind our EmployeeMaster class to the SQL Server table tbl_EmployeeMaster. We need to create a database context class to do that.
- Right-click on the Models folder and choose Add -> Class to add a new DBContext class.
- Put a name for this class file. We have used “EmployeeMasterDBContext.cs” in our case.
- Now, open the “EmployeeMasterDBContext.cs” file and add the below source code.
using System;
using System.Collections.Generic;
using System.Linq;
using System.Threading.Tasks;
using Microsoft.EntityFrameworkCore;

namespace ASPNETCoreCRUDSample.Models
{
    public class EmployeeMasterDBContext:DbContext
    {
        public EmployeeMasterDBContext(DbContextOptions<EmployeeMasterDBContext> options) : base(options)
        {

        }
        public DbSet<EmployeeMaster> JobLoadParams { get; set; }
    }
}
Notice that we have Inherited the DbContext class and we have also added the appropriate using statements that are required to use Microsoft.EntityFrameworkCore library.
Add a dependency injection in Startup.cs class in ConfigureServices method
Now, we need to add a dependency injection into the Startup.cs file for our DBContext class.
- Find the ConfigureServices method.
- Add the DbContext reference at the end of the method. We have added these lines after “services.AddControllersWithViews();“. The method looks like this:
public void ConfigureServices(IServiceCollection services)
        {
            services.AddControllersWithViews();

            //Add all db context classes here
            services.AddDbContext<EmployeeMasterDBContext>(options =>
            options.UseSqlServer(Configuration.GetConnectionString("WebAppTestDB")));
        }
- Also, add these using statements at the top of the Startup.cs file:
using ASPNETCoreCRUDSample.Models;
using Microsoft.EntityFrameworkCore;
Add a new scaffolded item with controller and views
Now, we need to add a new scaffolded item which will add a controller along with all the required views to facilitate CRUD operations in our web application. To do that:
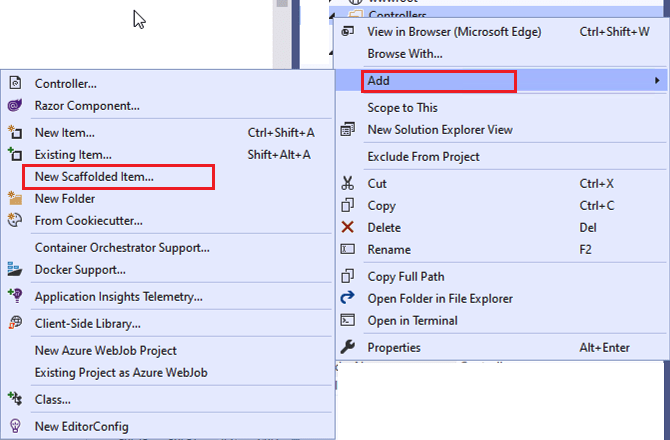
- Right-click on the Controllers folder and choose Add-> New Scaffolded Item.
- We need to choose a template “MVC Controller with views, using Entity Framework” and click on the Add button.
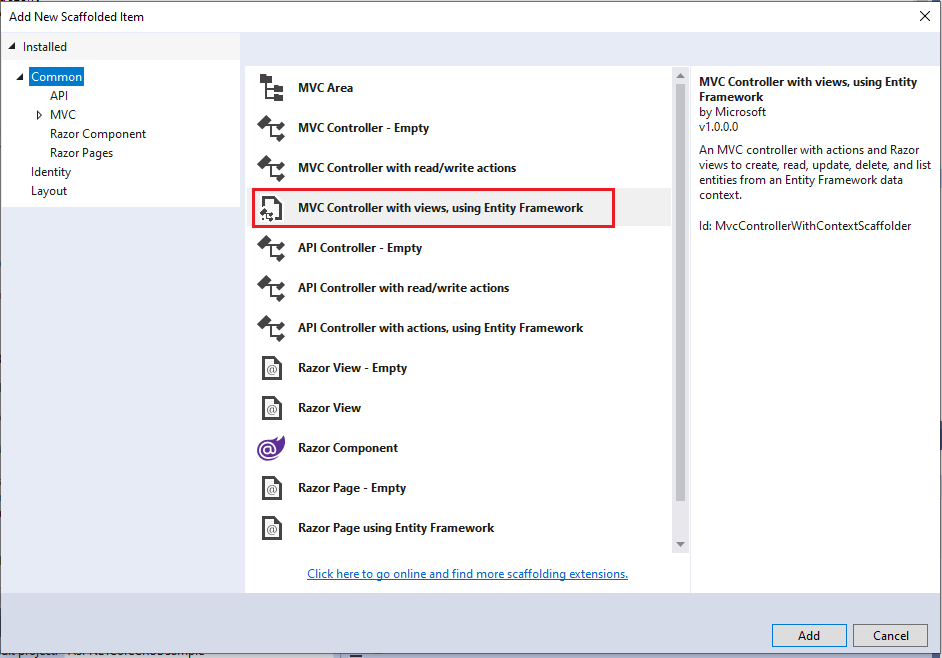
- It will ask to choose the model and data context class on the next screen. Choose the Model class as EmployeeMaster and Data context class as EmployeeMasterDBContext and click on the Add button.

- It will take some time as it will install the required packages for automatic code generation followed by the project build operation.

- Once this is done, it will add the controller and views for the selected model which is EmployeeMaster in our case.

- Now, we can build and run this application using Visual studio or we can press F5 button on the keyboard. In your browser, browse for the URL “https://localhost:44336/EmployeeMasters“. Change the port number with your application port. It will open a User Interface with all the CRUD funtionalities (Create, Read, Update, and Delete options).

- Click on the Edit link to open the Edit view.

- Click on the Details link to open the detailed view.

- Click on the Delete link to open the Delete view.
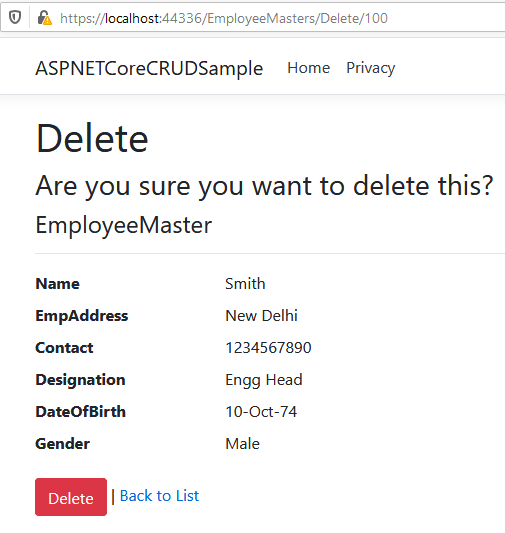
Now, we have a full-featured CRUD web application up and running at our local machine. We can create, view, edit, and delete the rows from the EmployeeMaster table using this user interface. Also, the look and feel of the user interface can be enhanced by modifying the HTML of the views.
Thanks for the reading. Please share your inputs in the comment section.

I wanted to express my gratitude for this enthralling read! I savored every single bit of it. I made sure to save your website in my bookmarks so that I can keep updated on any new posts pertaining to asp.net development.